 |
| https://lisaliddy.wordpress.com/tag/jewelry/ |

Learning Objective: Students will learn advanced soldering techniques to create unique one of a kind beads.
Language Objective - Students will learn Bead Making Vocabulary through writing the words down and making beads.
Language Objective - Students will learn Bead Making Vocabulary through writing the words down and making beads.
Agenda -
- Create your bead designs. Come up with 5 solutions. You will be making three beads.
- Be sure to include to design beads and concept for wearing the beads. (Chain work, ring, other).
- Include Cutout, wire design, and or texture in your plan.
or
Die cut the metal 1st If you choose to do a wire design or cutout
Solder Wire to your Bead after soldering the bead together.
Bead Making Vocabulary
Anneal - The process of using heating and cooling to produce the softest state in a metal and to reduce its internal stress. A hard metal may be annealed to soften it and make it more malleable and less prone to fatigue or cracking and breaking.
Dapping block- is usually a cube or flat rectangular block of steel in which various half-sphere impressions, called “dies,” are cut.
Dapping Punch- are cylindrical steel rods with a spherical bulb on one end. Die sizes are not marked on the block, but the diameter of the punch sphere is stamped in millimeters on the shank.
Disc Cutter- A steel tool used to cut perfect circles. Metal is slipped between the two blocks and the die or round cutter is placed in the circle and hammered.
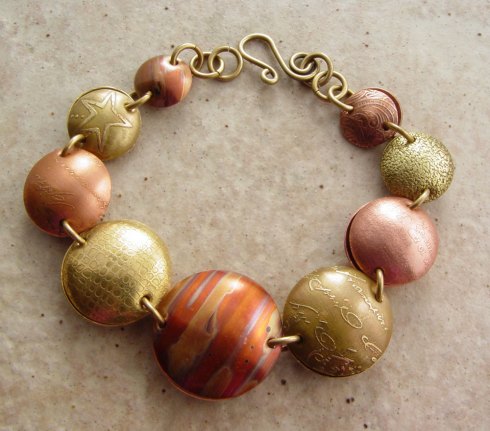
MRHS Student work


Step by Step Instructions:
- Texture your metal
- Cut your circles the same size using the disc cutter tool.
- Try to use one firm hammer stroke per die until the last two steps, where more strokes are needed. Anneal again after dapping every two steps.
- Design the bead using piercing or solder wire design.
- File triangle shapes on the upper sides of the discs, or drill center holes in each disc. Even if you want a larger hole in the final bead, realize that during doming, the hole will stretch from 20-gauge to about 18-gauge, or 1 millimeter. If the hole is drilled smaller than #68, doming will close the hole; if larger, the hole will over-stretch and warp out of shape.
- Dome your discs. Start with annealed discs. Start with the large wooden block and pear shaped hammer. Then move to the dapping blocks. Dap them as round as you want them.
- File the edge flat on each side of the bead.
- Fit the two sides together, using binding wire if needed.
- Solder your bead together using easy or extra easy solder.
No comments:
Post a Comment